Chatbot Design Approach
What will the Chatbot do? When you’ve been tasked to design a chatbot, identifying a business case that will provide customers with value is the first step.
Below I’ve outlined the process and tools that I’ve used when creating chatbots. The approach is collaborative and human centred.
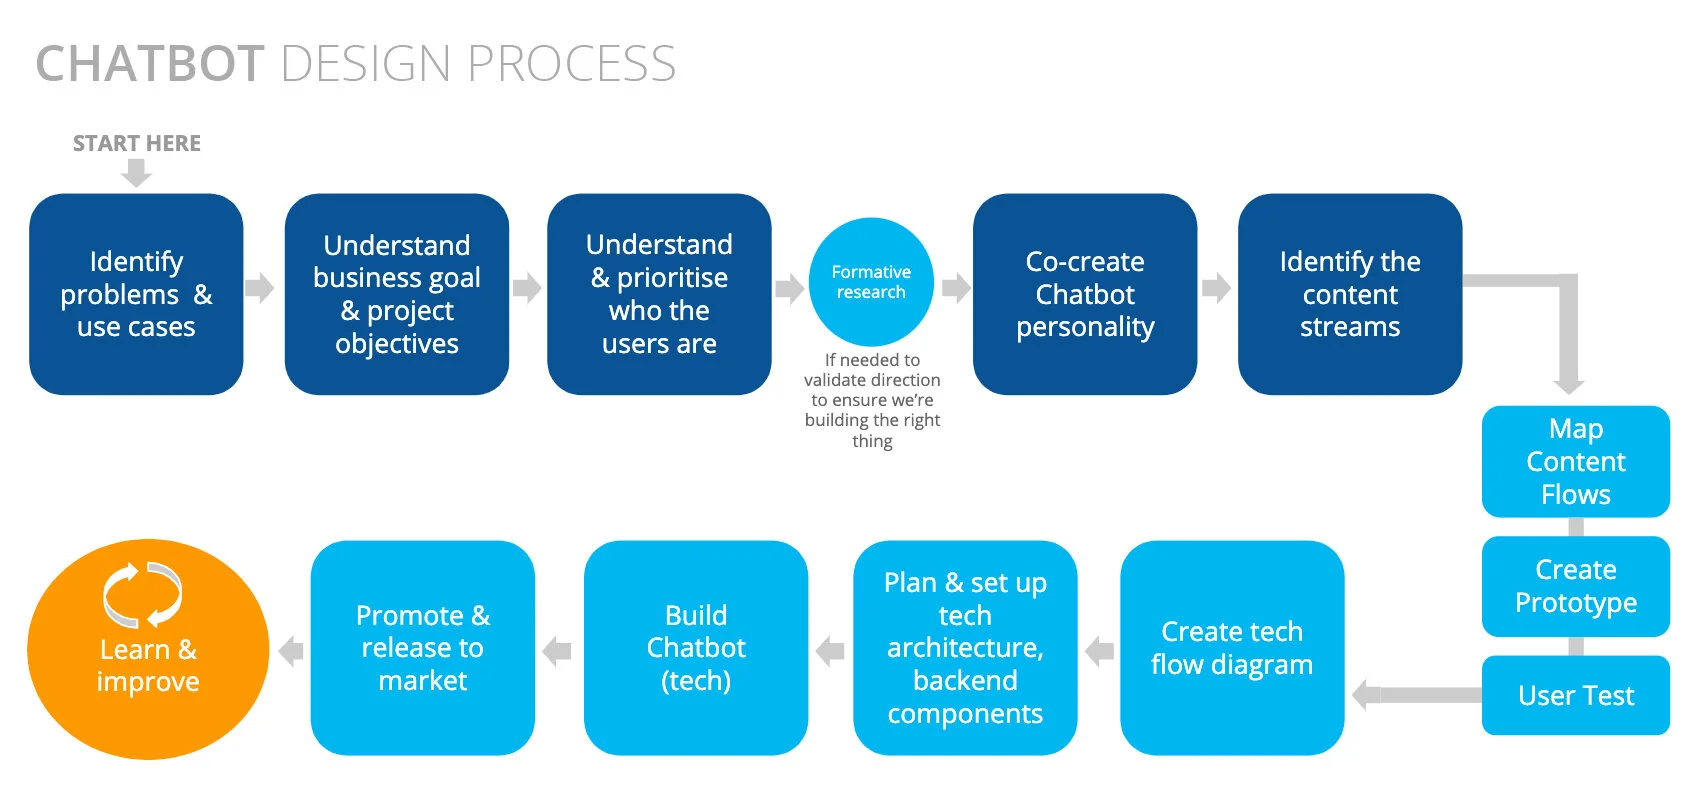
Step 1: Identify and prioritise the business case that will provide the hightest return on investment and provide your users with the most value.
Collaboratively in a workshop setting identify all the problems that need solving. The problems can be for internal staff as well as customers. Think about call centres and the issues that can be streamlined and automated. Formative user research can be conducted prior to the workshop in order to present validated problems by ‘real’ users. Research can also be done after the workshop to validate assumptions and ensure you’re actually building the right thing for the right reasons.
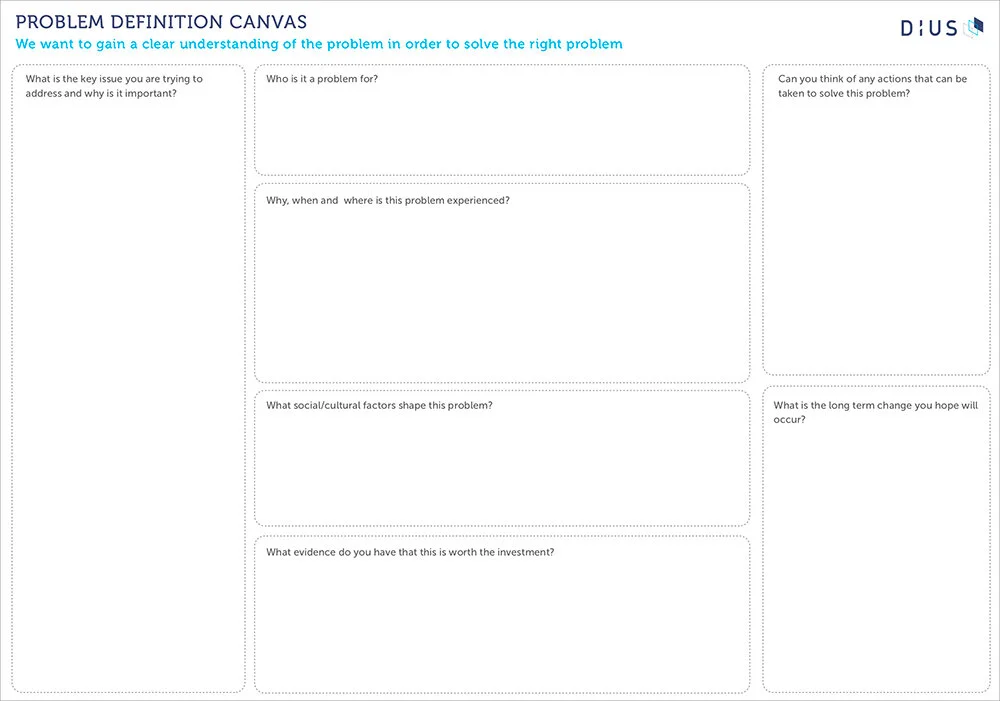
Problem Definition Canvas
Collaboratively fill in the canvas for each problem. Then prioritise each problem by setting criteria that is important to the business, for example highest business value and customer value.
Step 2: Define the goal of the Chatbot and what you hope it will achieve & prioritise your users. Now that you have the problem articulated you can begin to define the goal and purpose of the Chatbot and ensure it’s aligned with the business goals. This is a good time to identity the jobs to be done by the Chatbot by different user types, so you can then test and validate these tasks with users.
Some of the problem scenarios that Chatbots are applied to include:
Support customer service activities; eg. Call centers, bookings, signing up, alleviate pressure from call centre staff by funnelling customers, etc.
Increase awareness that will lead to new behaviours; e.g. informing customers of new products and membership benefits, destinations with special offers, etc.
Provide support through online engagement at different customer journey steps; e.g. service FAQ sections, is user is browsing through membership benefits or in a help section, etc.
Promote new products, sales and benefits.
Step 3: Validate with user research. Conduct qualitative research to understand the users pain points are in detail, to validate the jobs to be done, to understand whether they are likely or unlikely to want to engage with the Chatbot and to find out what it is that they hope the Chatbot will do for them.
Step 4: Create the Chatbot personality. In a workshop setting, bring all the important stakeholders together so that you can breath life into the chatbot. The Chatbot personality should be aligned to the brand, the voice and conversational style should be aligned to what customers expect your brand to sound like. Once everyone has settled on a personality for the Chatbot an avatar will need to be designed.
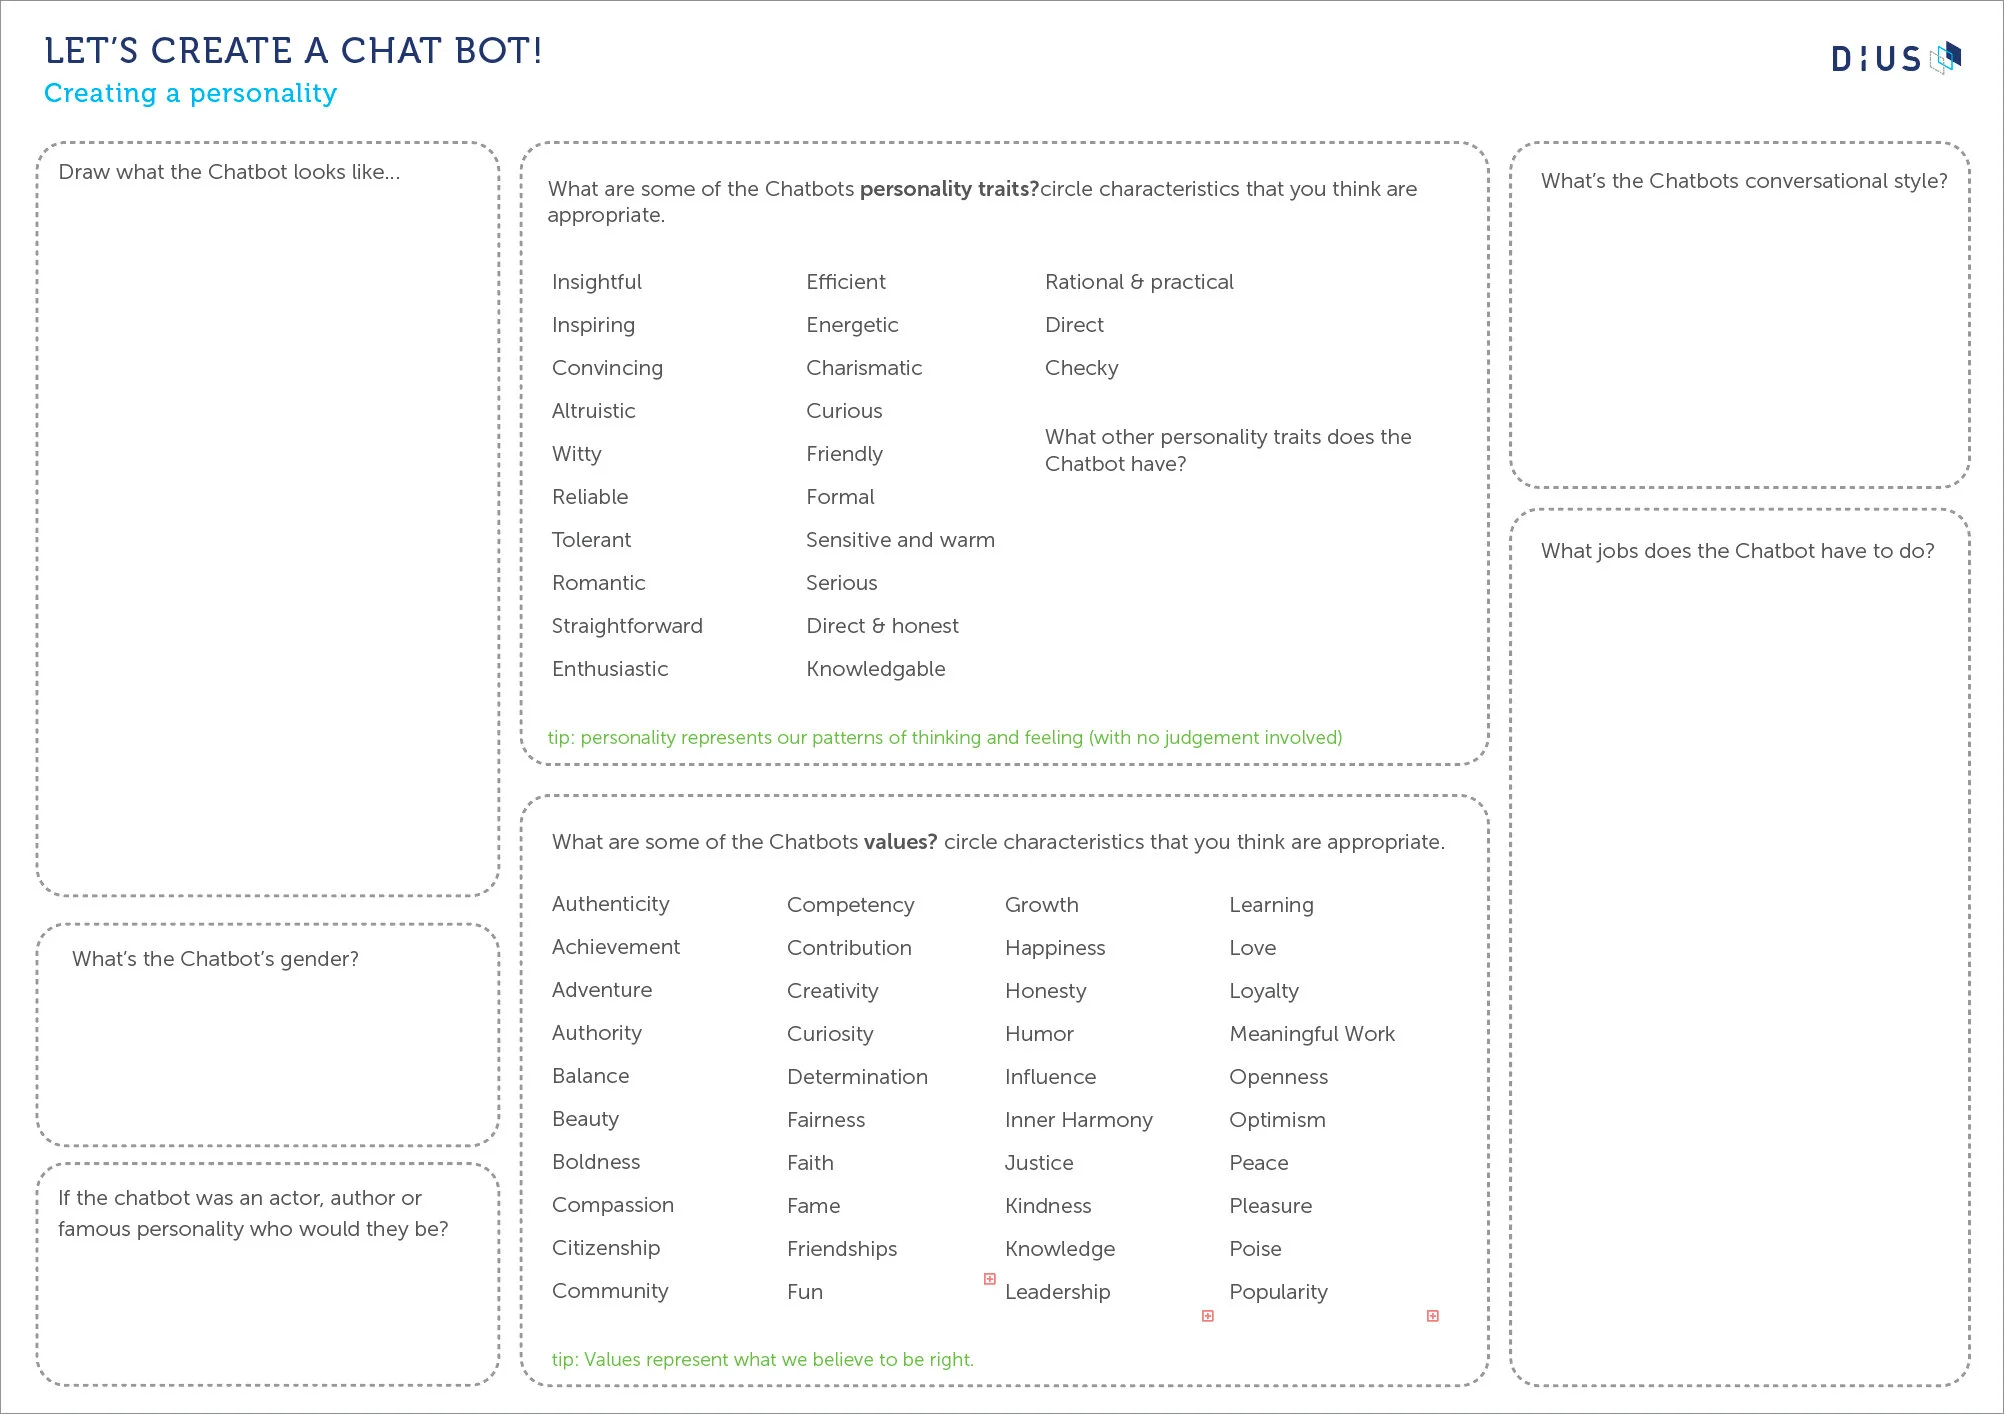
Chatbot Canvas
Use this worksheet to create the chatbot personality.
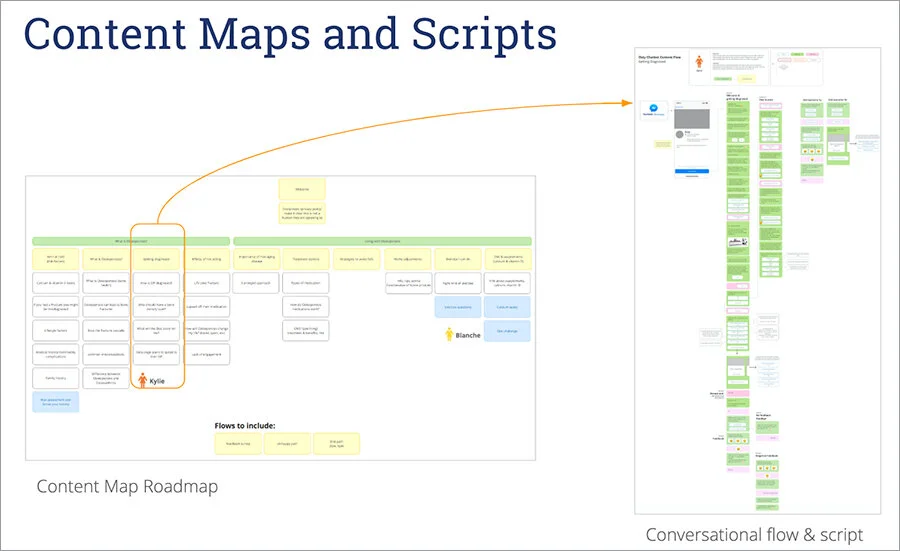
Step 5: Map the content streams. Content streams are conversations and conversational flows that the chatbot will have with a user. Start by listing the conversation themes along the top of a whiteboard or wall using post it notes.
Step 6: Create a prototype and test. Creating a prototype for a Chatbot is pretty simple, there are simple online tools like BotSociety which you can use to test your Chatbot before committing to code.
Step 7: Tech implementation and releasing an MVP. Before releasing a Chatbot into the wild make sure your client has realistic expectations of how ‘green’ it will be on first release. Chatbots need continuous monitoring and improvement and you’ll need to assign a Chatbot custodian who will do that.
Step 8: Continuously learn and improve. As you learn what’s working and what’s not working, it will need tweaking. You’ll also add additional conversation flows as you begin to see value and spot opportunities for more value.